Connecting/Funding an Algorand (test) Wallet from a Reach + React Application
Today we are going to be putting together a very quick, basic application in React that will showcase how to connect and fund an Algorand test wallet with the help of the Algosigner extension and the Reach dapp language. To create the application we are going to use the create-react-app boilerplate; while this a bit of overkill due to the testing and CSS files not really being used in this tutorial, the alternative nano-react-app can’t be used just yet as the team at Reach are in the process of supporting Parcel. I’ll make sure to post an update on this article once it is supported.
UPDATE: alright, now Parcel is supported; please see this tutorial for some insight on integrating it into your application.
UPDATE — 11/27/2021: to get this tutorial to work with the latest Reach library some changes were made:
- Switched from using
getDefaultAccounttocreateAccount. This eliminates all signing events making testing dapps a breeze. This also means you can ignore that Algosigner requirement below. - Switched from using the old fund test wallet method to
fundFromFaucet - Changed to using the
loadStdlibmethod for importing the Reach frontend library to get it to work with the latest version of Reach.
To start out with, there are some prerequisites. These are the following:
- Reach set up for Windows
- npx usable in the command line
- A throwaway testnet wallet created with Algosigner (with phrase on hand)
With all those set up, we are ready to start building the application.
To begin we are going to open up VS Code, use CTRL+ ` to open the terminal, and enter cd desktop (or whichever folder you want this project in). Now we are going to run npx create-react-app connect-wallet to create our boilerplate. Once thats done (it takes a while to load), we’ll open the connect-wallet folder in VS Code.
Here, inside the project folder, we are going to open the terminal again and type in yarn add @reach-sh/stdlib to install the reach package (you can use npm if you want). Once that’s done loading we are going to open up src/App.js and import reach and useRef like so:
Now with that set up we are going to head down to the return, clear out the boilerplate HTML, and put in our own
Before we create that connectWallet function, we are going to need to create the two helper functions it calls: getAccount and getBalance. To start that process we’ll create two variables:
These will allow us to store the account information from the Algorand wallet and its balance. Now onto the first function: getAccount
As you can see this is a rather simple async function, and only one line, but I’ve turned it into a helper function to give a better impression of the stages of this tutorials processes. It calls the reach.createAccount command, which we’ll see in action later, to stand up a test account; and then we log that test accounts information so that we can get a rough idea of what data it gives us. Anyway, onto the getBalance function!
This one is a little more complicated. It starts by capturing the reach.balanceOfresult for the account in a local variable; the reason this command isn’t all we need is because its capturing the balance in microalgos. To change that rawBalance to being in Algos, we run it through the reach.formatCurrency command which will complete that translation for us. We’ll then log the balance so we can see how much is in this wallet. Now that those are both complete we can return to the connectWallet function.
This is really just a simple caller; as both of the prior functions are asynchronous, so will this one be while it awaits both of them. Sadly, we aren’t yet ready to fire up the application. We now need to download Reach proper into our src folder so that we can run a key part of this: the local Algorand testnet.
To do that we’ll navigate to this portion of their documentation, grab this curl command: curl https://raw.githubusercontent.com/reach-sh/reach-lang/master/reach -o reach ; chmod +x reach , go back to VS Code, open up a WSL terminal, type in cd src , paste in this curl command, and run it. Now that we have Reach proper installed we can run this command REACH_CONNECTOR_MODE=ALGO-devnet ./reach devnetfrom our current place in the terminal to start up the Algorand testnet.
Now with that running, we can open a regular terminal, type in yarn start , and get to see how our application looks:
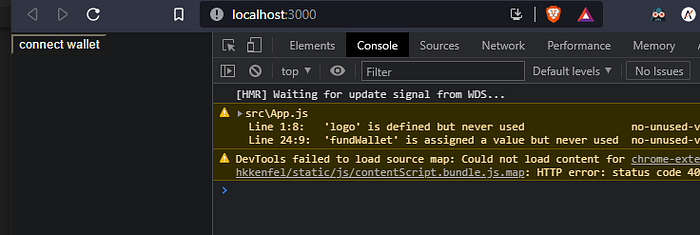
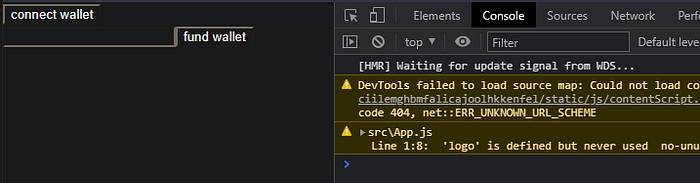
Not much to look at to be honest; lets click on the connect wallet button:
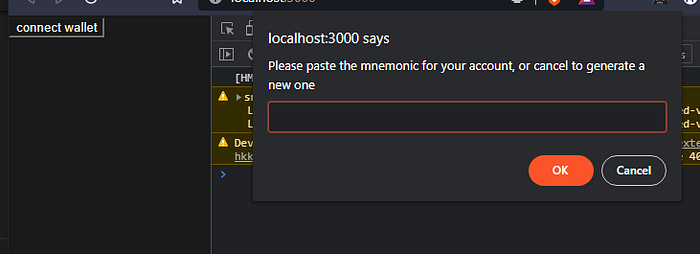
UPDATE — 11/27/2021: due to changing this tutorial to use createAccount instead of getDefaultAccount you will no longer see this popup.
Here is where we’ll need to enter the phrase from that throwaway test wallet we created (or we can click cancel to generate a temp wallet exclusive to this browser session):
NOTE: This prompt isn’t what the user is going to see in your future on-production dapps, it’s just here to speed up development by auto-signing the transactions. To view the other methods of dapp connection available for Algorand, in Reach, please see this page in the Reach docs
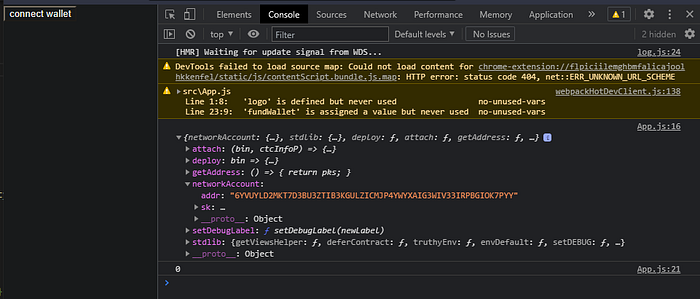
And success! We’ve captured both the account information and the wallets balance.
However, a connect button alone won’t give us the ability to test our dapps. We need test funds if we are going to be able to make transactions, pay fees, and more. This next part will be creating a faucet to give our test wallet some test funds.
First, we’ll add a new variable fundAmount below our other variables. Then we’ll create a new function that will use it: fundWallet
UPDATE — 11/27/2021: this tutorial was updated to use the reach.fundFromFaucet which is a much simpler way to fund a test account then the multiple steps used in prior versions.
This wallet begins by calling reach.getFaucet to give us a test funds faucet to work with. It then uses that faucet with reach.transfer to move test funds from the faucet to our test wallet. As some of you may have noticed reach.parseCurrency is doing the reverse of reach.formatCurrency and turning Algos into microalgos. It then calls getBalance to update our applications balance variable with the wallets new balance.
This function won’t stand on its own though, so we need to add an input field (to capture fundAmount) and a button (to call fundWallet) to our application:
And that should do it, provided our application is still running we should be able to refresh the page and see this:
Now we’ll connect our wallet, put 5 in that input, click “fund wallet,” and we should see… (after a few seconds)
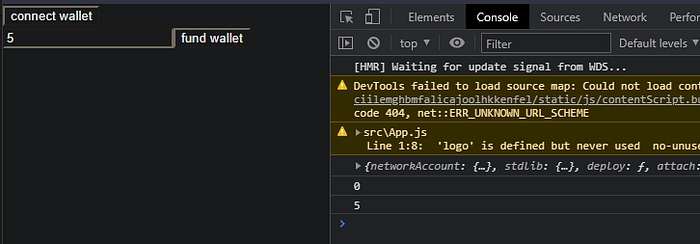
Excellent! Our test wallet was successfully funded with 5 test Algo!
Now, we have passed through the gate into the kingdom of decentralized app development. With the ability to connect our applications to test wallets and fund them with test funds, we now have the basic tools to start creating and testing dapps for Algorand.
However, it’d probably be best to start with the primary tutorial the Reach team put together. It’ll introduce you to the other side of dapp development (namely, the contracts) and it circles back to where you are now on the fronted.
After that, if you want to put a few more feathers of experience in your hat before trying to build one of your own designs, the Reach team has a plethora of simple workshops for various different dapp projects that have yet to be converted into web apps; these would be a great test of your skill, after completing the primary tutorial, and I highly recommend them.
Remember to join the Reach discord for any further questions and thank you all for reading this!